Showing posts with label network. Show all posts

Monday, May 15, 2017

How to Make a Network Cable

How to Make a Network Cable


Making Ethernet Cables - Tricks of the Trade


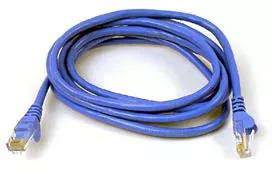
Ethernet Cable


HOW TO MAKE AN ETHERNET CABLE
Purchasing fully made Ethernet cables from the store can be quite expensive.  It is far easier to simply buy a box of bulk Category 5e Ethernet cable and then attach your own RJ-45 connectors to the cut ends of your preferred cable length.


Bulk Ethernet Cable - Category 5e or CAT5e

(You may also use Category 6 or CAT6 cabling which has higher performance specifications and is about 20% more expensive than CAT5.)


Bulk RJ45 Crimpable Connectors for CAT-5e
or
Bulk RJ45 Crimpable Connectors for CAT-6


RJ-45 Crimping tool


There are two kinds of Ethernet cables you can make, 
Straight Through and Crossover.STRAIGHT THROUGH 
Ethernet cables are the standard cable used for almost all purposes. 
It is highly recommend you duplicate the color order as shown on the left. 
Note how the green pair is not side-by-side as are all the other pairs.
 This configuration allows for longer wire runs.


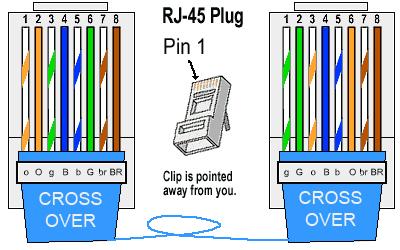
CROSSOVER CABLES - The purpose of a Crossover Ethernet cable is to directly connect one computer to another computer (or device) without going through a router, switch or hub.


Heres how to make a standard cable:

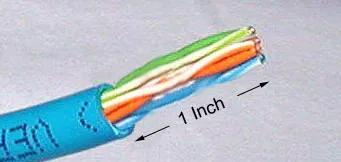
cut into the plastic sheath about 1 inch (2.5 cm) from the end of the cut cable. The crimping tool has a razor blade that will do the trick with practice.


Unwind and pair the similar colors.


Pinch the wires between your fingers and straighten them out as shown. The color order is important to get correct.


Use scissors to make a straight cut across the wires1/2 Inch (1.3 cm) from the cut sleeve to the end of the wires.


Push the wires into the connector. Note the position of the blue plastic shielding. Also note how the wires go all the way to the end.


A view from the top. All the wires are all the way in. There are no short wires.


WRONG WAY - Note how the blue plastic sleeve is not inside the connector where it can be locked into place. The wires are too long. The wires should extend only 1/2 inch from the blue cut sleeve.


WRONG WAY - Note how the cables do not go all the way to the end of the connector.

Criming Ethernet


CRIMPING THE CABLE ... carefully place the connector into the Ethernet Crimper and cinch down on the handles tightly. The copper splicing tabs on the connector will pierce into each of the eight wires. There is also a locking tab that holds the blue plastic sleeve in place for a tight compression fit. When you remove the cable from the crimper, that end is ready to use.


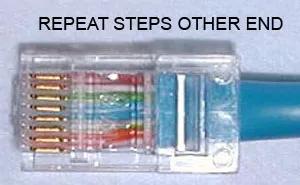
Ethernet Repeat Steps


For a standard "Straight Through" cable, repeat all steps and wire color order on the other end of cable. For a cross-over cable, the other end will have a different color order as shown by the crossover picture above.

Ethernet Cable Tester

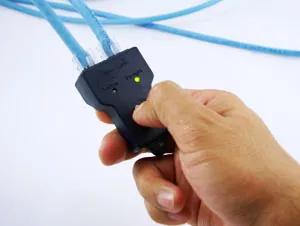
Make sure to test the cables before installing them. An inexpensive Ethernet cable tester does this quite well.


Available link for download

Read more »

Sunday, May 7, 2017

How to Connect a PC to a Network

How to Connect a PC to a Network


How to Connect a PC to a Network


Connecting to a network is a convenient way of sharing data between computers. The steps to add a computer to your network will depend on the operating system your device is running. Either way the process is a simple one. You’ll need a network router (preferably wireless) and two computers.

Part 1 : Setting Up Your Router


1.Plug the router into a power source. Turn it on.


2.Connect the main Internet line to the router. The router ports should have names corresponding to what should go where. If your connection is a DSL connection, plug the main line into the ADSL port.


Part 2 : Setting Up Your Network Witn An Ethernet Cable


1.Plug an Ethernet cable into your computer. The Ethernet port should be located on the rear of your desktop or laptop. If you’re using a laptop with wireless Internet capability, simply connect the laptop to the wireless network of the router, provided that the router is also wireless-capable. The default password of the router should be written somewhere on the bottom of the router, if your router is new.


2.Connect the other end of the Ethernet cable to the router. The other end should be plugged into a LAN port in the router.


3.Check for network connection. To do this, head to the "Start" menu and type “Network” on the search bar.
  • In the search results, click on "Network." You should see both the PCs in the network in the "Computer" sub-menu.

Part 3 : Setting Up Your Wireless Network

1.Locate the Network (Internet Access) Icon. Youll be able to find this in the bottom right hand corner of the screen next to the date and time. Hover your cursor over the icon to confirm the name.
  • You can also access network settings by going through Control Panel > Network and Internet > Network and Sharing > Connect to a Network.
2.Find your wireless network. Click connect.

3.Enter security key. This is only necessary if the security settings require a password. Click Ok.

4.Double check connection. Go back to the bottom menu bar and check to see the Network icon in the right hand corner. If your PC is connected to your network a line of bars will appear.


Available link for download

Read more »