Showing posts with label mac. Show all posts
Showing posts with label mac. Show all posts
Sunday, June 4, 2017
How to Change my computer Mac id
How to Change my computer Mac id
How to Change my computer Mac_id?
?????? Follow This Step ??????
1.Most network cards will allow you to set a custom MAC address from their configuration panes in the Device Manager, although some network drivers may not support this feature.
2.First, open the Device Manager. On Windows 8.1, press Windows Key + X and click Device Manager. On Windows 7, press the Windows key, type “Device Manager” to search for it, and click Device Manager.
3.Locate the network interface you want to modify under Network Adapters, right-click it, and select Properties.
4.Click the Advanced tab and select Network Address in the list. Your network driver doesn’t support this feature if the option isn’t here.
5.Enable the Value option and enter your desired MAC address without any separating characters — don’t use dashes or colons. Click OK afterward
Available link for download

Saturday, April 8, 2017
How to Create a Scientific Calculator on a Mac
How to Create a Scientific Calculator on a Mac
How to Create a Scientific Calculator on a Mac
Read this article to find out how to create a scientific calculator.
1.Open the application, "Calculator."

2.On the menu bar (the very top of the Mac screen), there will be Calculator, File, Edit, etc.
3.Click on "View," and then click "Scientific."
4.Finished.
Available link for download
Sunday, March 26, 2017
How to Take Screenshots on a Mac with Apowersoft Mac Screenshot
How to Take Screenshots on a Mac with Apowersoft Mac Screenshot
How to Take Screenshots on a Mac with Apowersoft Mac Screenshot
Generally speaking, people who shift from Windows to Mac are often confused about the method for Print Screen, since the shortcut key to take a screenshot on Mac is different from Windows. While a combination of "Command + Shift + 3 or 4" shortcut keys will allow you to take screenshots on a Mac, the problem that arises is that captured content cannot be edited. To work around this, you can use the third-party tool Apowersoft Mac Screenshot. This tutorial will instruct you on how to take screenshots on a Mac more efficiently.
Method 1 :- Taking the Screenshot
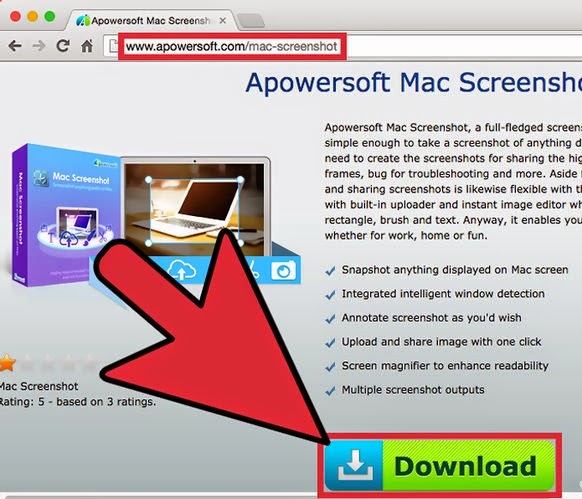
1.Launch the application and preset the options. Open the official website and click "Download Desktop Version" button to download and install the application. A thumbnail of its icon will appear at the top menu bar once you launch it, just left click it and select "Options" in the drop-down menu, then you can enable your preferred keyboard shortcuts and choose the desired image quality.
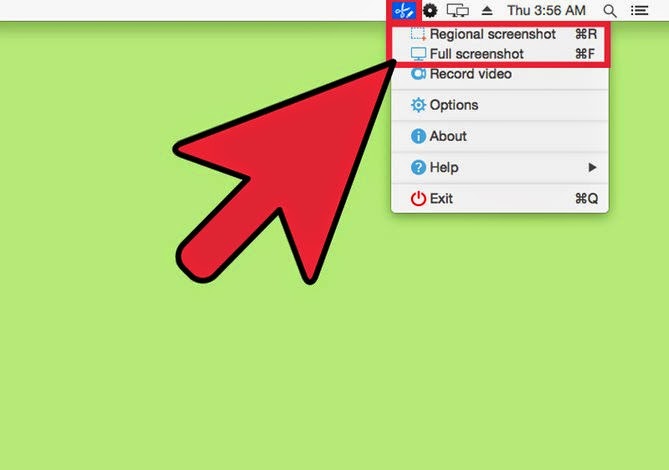
2.Select a capture mode. Full screenshot and Regional screenshot modes are both available for this application––select the one you need and begin to grab your screen.
- Full screenshot mode will capture the whole desktop and automatically save to the target output folder.
- Regional screenshot enables you to customize the capture area, just drag your mouse cursor to snap the content and then let go of it when the capture is finished.
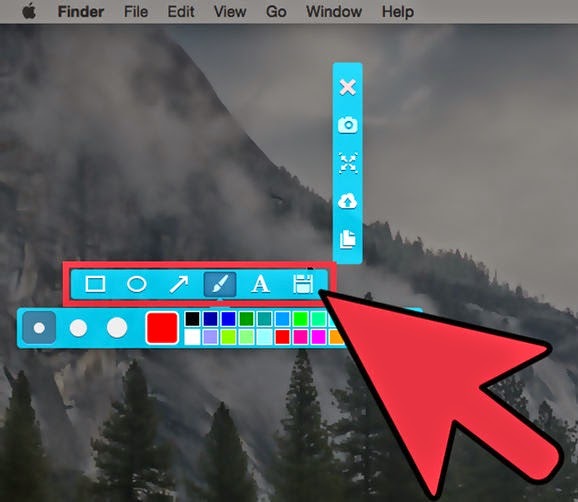
3.Edit the captured image with the editor bar. Once the screenshot area is confirmed, an editor panel will show next to the border. You can draw shapes, arrows, add text, or highlight with a marker pen, as needed.
Method 1 :- Sharing and saving the screenshot
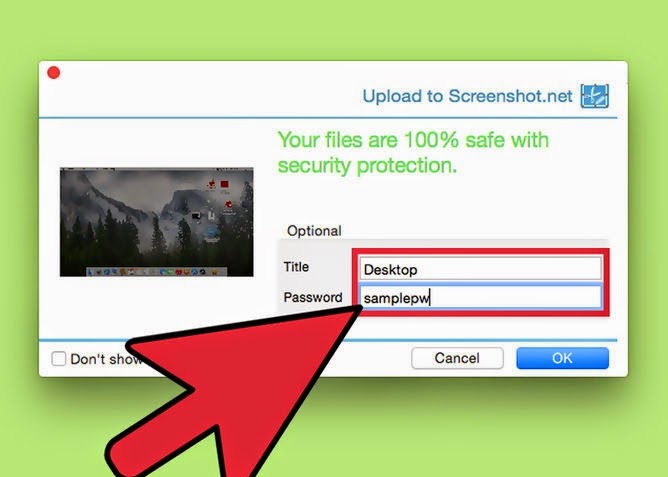
1.Upload the screenshot to cloud storage (optional). This will help you to see the screenshot on a different computer. Just click the cloud icon and upload the captured image to the free cloud space, then you can download it, anytime and from anywhere. You can also key in a password to stop others from accessing it.
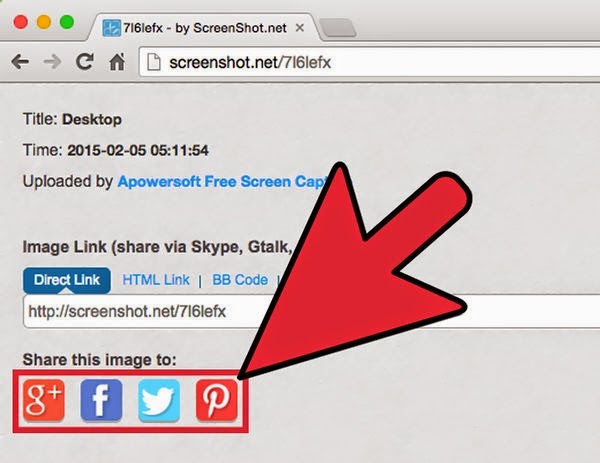
2.Share the image to social media (optional). You can share the image to a social network after uploading it to free cloud space. There are various social media sharing options available, such as Google+, Facebook, Twitter, and Pinterest. Just select one, then the uploaded image will be automatically shared to your personal account.
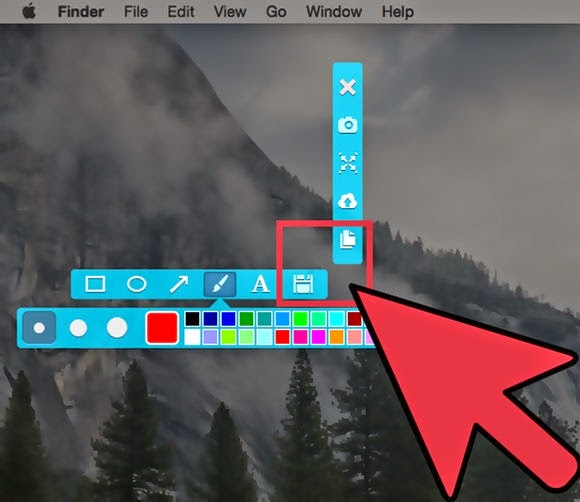
3.Save the image or copy to the clipboard. There is a thumbnail of disk icon on the horizontal editor bar and a piled paper icon on vertical, you can click the first icon to save the captured image to your local disk, or hit the vertical one to copy the captured content to clipboard, and then paste to WordPad or anywhere else.
Available link for download
Wednesday, March 1, 2017
How to Connect Android to a Mac
How to Connect Android to a Mac
How to Connect Android to a Mac
If you connect your Android to a PC, you will have no problems searching files with Windows Explorer. If you connect it to a Mac however, you wont be able to do that by default. You will need an app like the “Android File Transfer for Mac.” With this application, you will be able to search files and folders with a Mac.

1.Download Android File Transfer. You can download the file here:http://www.android.com/filetransfer/. After downloading, drag the Android File Transfer icon to the Applications folder.
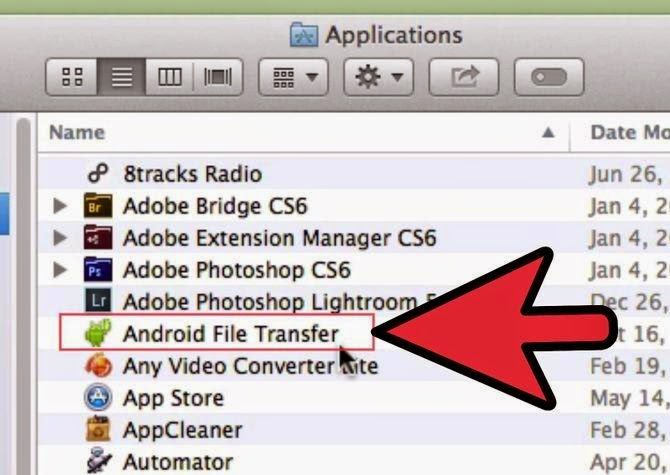
2.Connect the USB cable. Connect one end of the cable to the device and the other end to the USB port of the Mac.
3.Launch Android File Transfer.
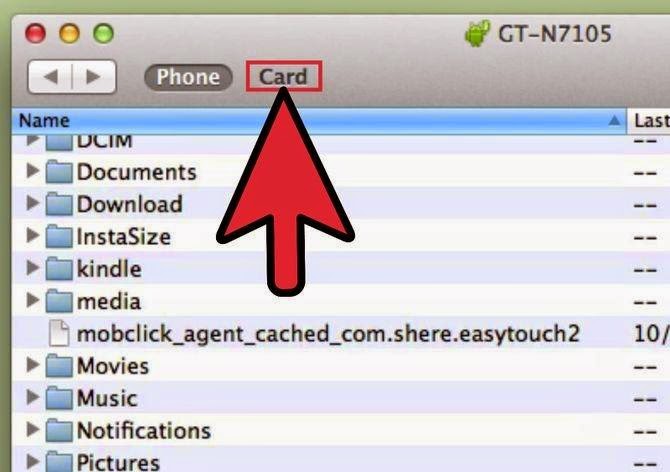
4.Browse. Your device will be automatically detected by the application. You will now be able to drag and drop files to and from your computer and delete excess files.
Available link for download
Subscribe to:
Posts (Atom)