Showing posts with label create. Show all posts
Showing posts with label create. Show all posts
Friday, June 16, 2017
How to Create a Nameless Folder in Computer
How to Create a Nameless Folder in Computer
How to Create a Nameless Folder in Computer
Have you ever wanted to create a nameless folder on your computer? Follow these simple steps to create your own nameless folder.
1.Right click on the desktop or within any directory.
2.From the context menu choose "New" then click on "folder" or,
3.Right click on any folder you want and choose "Rename".
4.With the name field for the folder still highlighted, press delete.
5.Press and hold the alt key and type the numerals 0160.
6.Release the alt key and press the enter key.
7.Kick back and enjoy the cleanliness of your new nameless folder.
Available link for download
Thursday, June 15, 2017
How to Create Video from Power Point
How to Create Video from Power Point
How to Create Video from Power Point
1.Create or open Power Point slide. Create a new Power Point presentation or open an existing one.
2.Record audio. Now you are ready to record your audio.
- Select Slide Show from the menu and click Record Slide Show.
- Click Start Recording.
- Click next and record audio until you are done with all the slides.

Available link for download
Thursday, June 1, 2017
How to Create an Apple ID Account and Download Apps from Apple App Store
How to Create an Apple ID Account and Download Apps from Apple App Store
How to Create an Apple ID Account and Download Apps from Apple App Store
There is no doubt that besides the features of the phone itself; apps are the things that make a smartphone even smarter. Apple also occupies the top place for apps manufacture. The app developer community of Apple has created over 775,000 apps for various products from Apple such as iPhone, iPad, iPod throughout the world and has spent billions dollars for them. Apple App Store is the place where you can get all those apps. Some of the apps can be downloaded for free while others are available in nominal price. Apple just recently announced that over 40 billion apps have been downloaded from app store since its launch in 2008. Apple claims that nearly 20 billion apps were downloaded in 2012 alone. It also claims that there are over 500 million active user of App Store. If you use any of the Apple products and want to download some apps from Apple App Story, you need have an Apple ID account. The same Apple ID account can be used to download apps from iTunes Store, App Store, iBookstore, and Mac App Store.
1.Creating an Apple ID account on iPhone
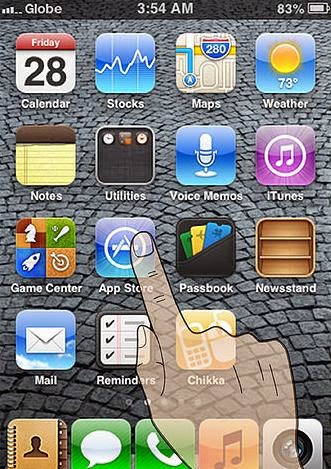
2.The very first thing, you need to do on your iPhone is find and open the App Store. You can locate App Store icon in blue color that contain the letter ‘A’ surrounded by a circle.
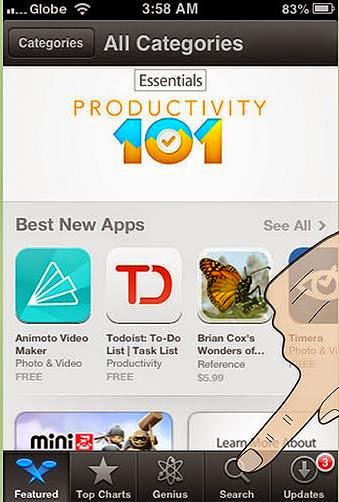
3.Next you need to browse and find the app you want to download. There are different categories like new apps, popular and frequently downloaded apps, featured apps, the current top 25 apps, or view apps by category for easy browsing. You can also directly search the apps you want to download by tapping on the search bar and typing the keywords or app name
4.Once you find the app you’re looking for, tap on it to view the details. The details of app may include complete description of the app, developers name or company, its price if not available for free, along with reviews and ratings provided by other iPhone users.
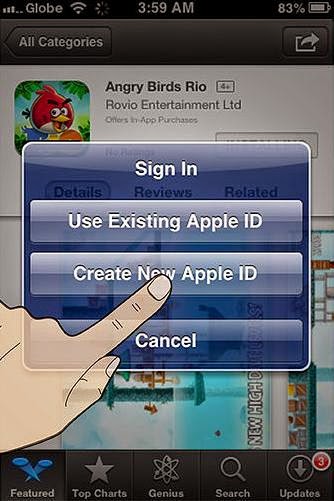
5.You then must tap on install button to install the app on your device. When you do that a new window appears telling you to sign in or create a new Apple ID. Proceed with create new Apple ID, fill in the necessary details and then tap Done.
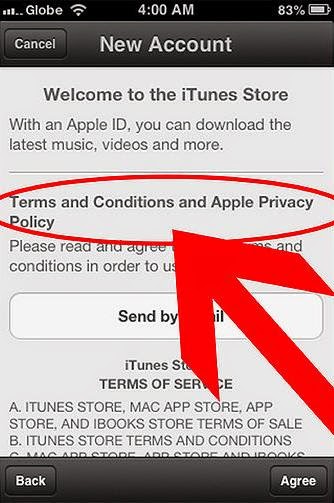
6.You’ll need to read the Terms and conditions of Apple App Store and click on Agree button located at the bottom of the page to proceed.
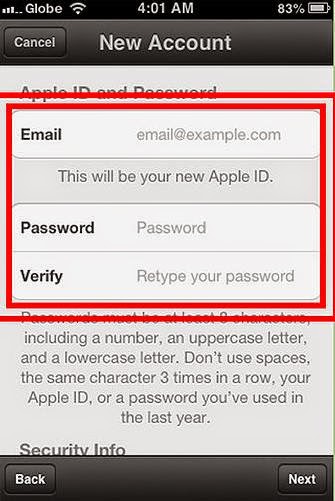
7.Next you need to enter your email address, birthday, answer security question, and create your password.

8.After that you need to select the mode of payment for paid apps and none for free apps and tap next.
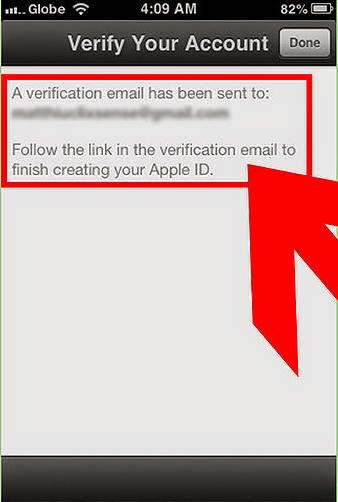
9.Now you will see a new window asking you to verify your account. You need to check your email to activate your account. And when you tap on the link you will automatically prompted to sign in with your account and password.
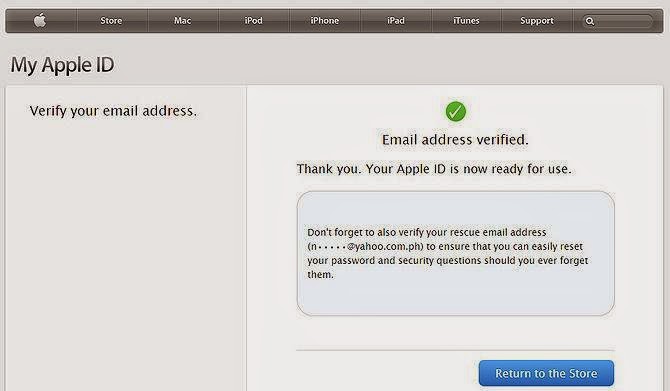
10.Once you do that, you have successfully created an Apple account and can now download the apps and enjoy iTunes, iBookstore and App store on your iPhone, iPad or iPod.
Available link for download
Saturday, May 20, 2017
How to Create a Video Album Using the Most Basic Tools
How to Create a Video Album Using the Most Basic Tools
How to Create a Video Album Using the Most Basic Tools
If youre a wannabe artist and love to pretend [and try to get in] that your in the media, heres a fun way to know how to make visually stunning albums and sell them, just like Beyoncé!
1.Get some software for your videos. Your going to need something like a camera, and obviously a computer program to edit the footage. Get something like Windows Live Movie Maker, which you can download for free, and just record yourself on a webcam.
2.Find a music source. If you have a cellphone with a recorder, you can record yourself singing the song (or part of it) and place it in the cameras microphone as you lip-sync to it. Try turning on your camera first and then quickly push the play button for your audio clip.
3.Try getting a nice background. Your not going to have an awesome music video if your set looks like a school kids bedroom. You need to design the area your camera views. Try doing something like a blank area, or a symbolic background.
4.Once you have all your footage, put in some effects. If you use something likeWindows Live Movie Maker, youre going to have a limit of effects. But make it work into the setting! You cant just put a random effect. Put something in there that makes sense.
5.Add some transitions! Nobody wants to see you turning on the camera, so put in a transition that will go straight to you singing. If youd like, you could put a transition that sends a subliminal message about the song. But if not, just make something that matches the scene.
6.Add an opening cover. People need to know the name of you and your songs, so add an opening title that lasts 4 - 7 seconds. You could also try introducing your video with some cover art. just in case youre really into the fake media thing.
7.Put up the video clips together so the computer sees it as one video. Make sure your video is received as one whole thing, or else, itll just be a file. Not a video. Put the clips all up together by saving it onto a file explorer.
8.Publish it! Once you have all your music videos together, go to something likeWindows DVD Maker and stylize your video album. Make a video wall or a screenshot. As soon as thats done, burn the DVD and you can sell it to your friends.
Available link for download
Saturday, April 22, 2017
How to Create Macros
How to Create Macros
How to Create Macros
A macro is a small program that performs a series of actions within software, such as word processors or spreadsheets. Most programs come with many macros you can access from menus or with a few keystrokes. However, you may find that you can complete the work you do easier and faster if you create macros of your own. Each software package has its own way of creating macros, but most should allow you to create a macro by recording.
1.Make sure you know how to perform each action you want and where to find all the menu options you need to select so you dont have to search for them while recording. The macro will record every keystroke and mouse click, including those that are mistakes, such as clicking on menu options that arent what you want. These mistakes will occur each time you run the macro.
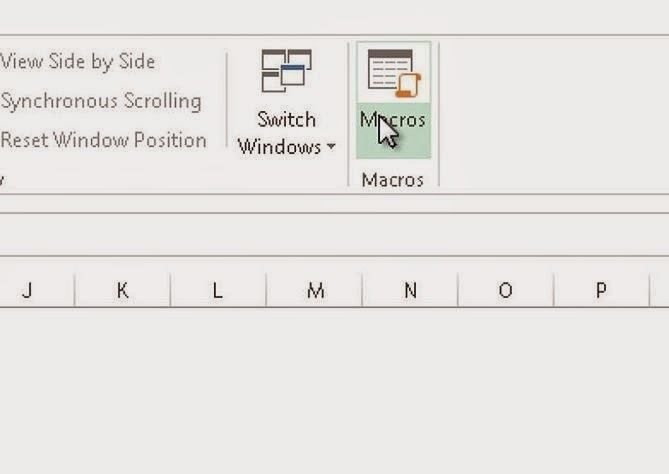
2.Find the macros menu and select the option to record a macro. You will see an icon or other indicator that you are recording. For instance, Microsoft Word will display an icon near your mouse pointer that resembles a cassette tape.
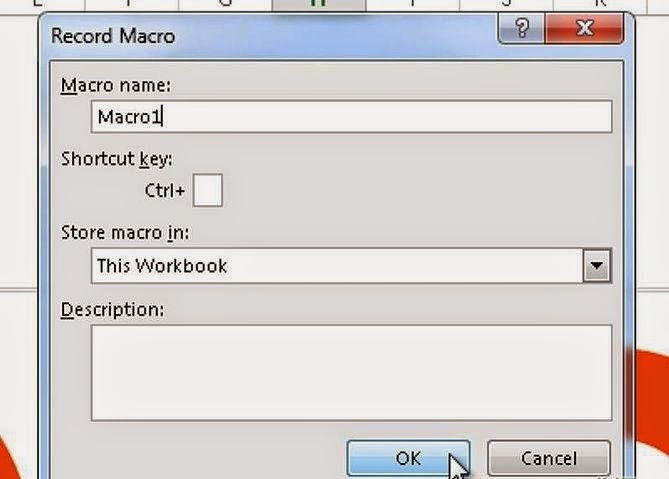
3.Name the macro. Give it it a name that will make it easy for you to remember what the macro does, and select one or a few keystrokes that you will use to run the macro.
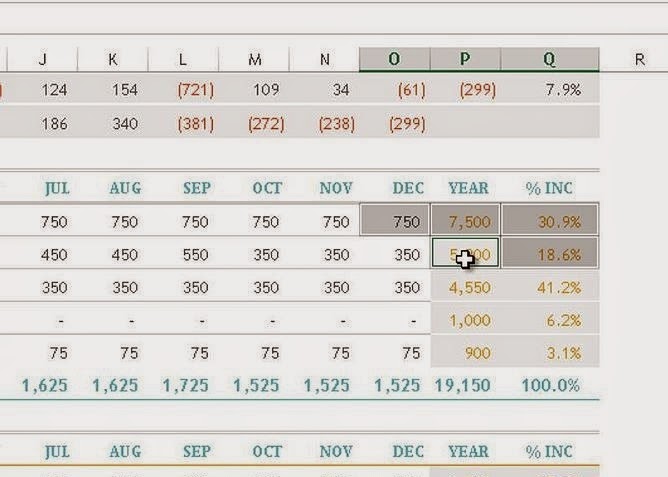
4.Perform the actions you want the macro to perform automatically for you.Examples are setting margins, fonts and tabs; creating headers and footers; choosing how the pages will be numbered and how you will view the document on the screen.
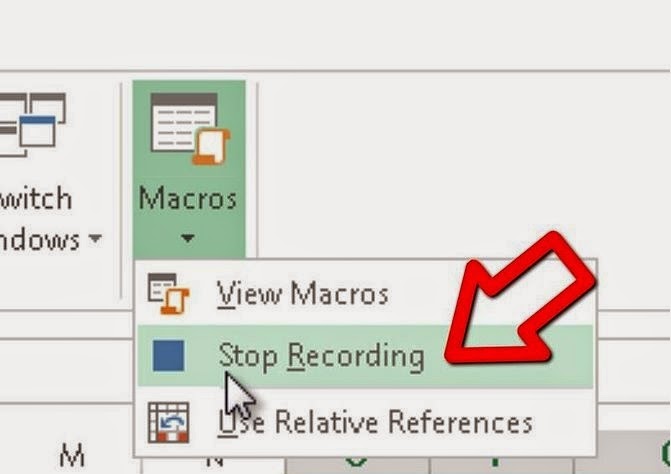
5.Stop recording.

6.Test the macro by using the keystrokes you assigned to it, or by selecting the macro from the menu and running it. See if it performs the functions you intend and that you get the correct result.
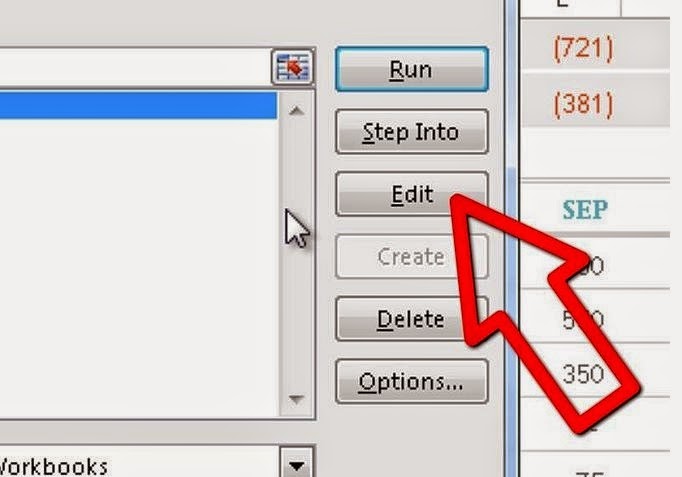
7.Edit the macro if you can; otherwise, re-record it. If you dont know anything about writing programs, you probably will not be able to edit the macro. Instead, re-record the macro to make changes, replacing the existing macro with a new one under the same name.
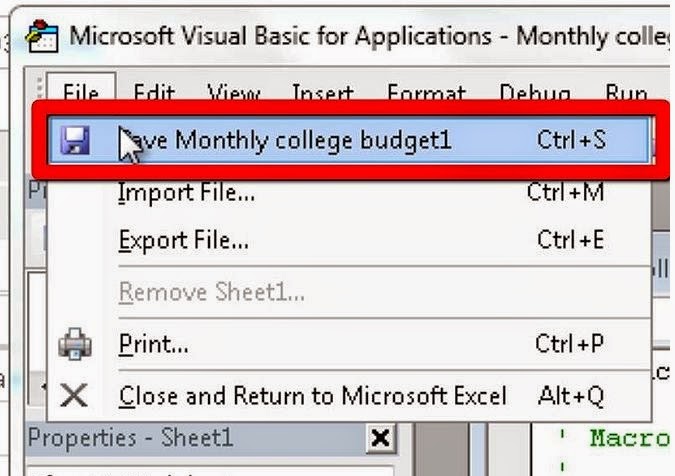
8.Save the macro, if prompted to do so as a separate step. Macros are saved in a specific directory with a specific file extension. If you change either of these, the software may not be able to find the macro the next time you want to use it.
Available link for download
Friday, April 14, 2017
How To Create a Facebook Page To Promote Your Business
How To Create a Facebook Page To Promote Your Business
How To Create a Facebook Page To Promote Your Business
This article is all about creating a Facebook page, how to create a Facebook page, sometimes referred to as Facebook Fan page also. A Facebook page is a single web page that is hosted by Facebook itself. A Facebook page can be created to promote your small business or any type of business. Sometimes a Facebook page can promote a famous person too.
These days everyone is creating their Facebook page to promote their business, starting from Coca-Cola to Barack Obama, everybody is having a Facebook page. But how do you create a Facebook page? I am writing this article because it is bit tricky to find any link to create a page on Facebook with new interface. So let’s move forward to the process of creating a Facebook fan page.

STEPS TO CREATE A FACEBOOK PAGE
Follow these steps to create a fan page, its easy and simple.
Step1: First of all Login to your Facebook account with your credentials.
Step2: After successfully logging in to your account click on this link: Create Facebook Page.This link will take you directly to page creation wizard.
Step3: Click on the type of the page you would like to create for you. You can choose from: “Local Business or Place”, Company-Organization or Institution”, “Brand or Product”, “Artist, Band or Public Figure”, “Entertainment”, “Cause or Community”. When you click on a category you can see another screen in the same page to select a sub category.
Step4: Select your sub category from the drop down menu and give it a name then click on the “Get started button”which will take you to the next screen.
Step5: In this screen you can upload a photo for your page and click on the continue button.
Step6: In next screen you can invite friends and import contacts to your new page and click continue to proceed further.
Step7: In the next screen you need to provide the basic information about page like web site URL etc.
When you are done with all these you can fill all other information in the subsequent screens. That’s all now your Facebook page is ready. Congrats!
You can also read How to get a custom name for your Facebook Fan page for more detail about getting a custom URL.
Available link for download
Saturday, April 8, 2017
How to Create a Scientific Calculator on a Mac
How to Create a Scientific Calculator on a Mac
How to Create a Scientific Calculator on a Mac
Read this article to find out how to create a scientific calculator.
1.Open the application, "Calculator."

2.On the menu bar (the very top of the Mac screen), there will be Calculator, File, Edit, etc.
3.Click on "View," and then click "Scientific."
4.Finished.
Available link for download
Tuesday, April 4, 2017
How to Create a Folder in Windows 8 and 8 1 with Shortcut Keys
How to Create a Folder in Windows 8 and 8 1 with Shortcut Keys
How to Create a Folder in Windows 8 and 8.1 with Shortcut Keys
1.So what you guys need to do is to go in any Folder or Local Drive where you have to create a folder.
- Than press and hold Alt and then press 2 (Alt+2), Its done you have created a folder with shortcut keys :)
- This saves your time of clicking and then go to new and than folder and than finally click on folder icon and your folder is than created.
2.The other way to create a folder quickly is :This Method also work in Windows 7, 8, 8.1 pro. :)
- Click right button of your mouse and than press (W) and than press (F).
- (Right click + W + F) press this keys one after other, Dont press at a same time other wise it will not work.
Available link for download
Wednesday, March 22, 2017
How to Create a Shutdown Icon on Your Desktop
How to Create a Shutdown Icon on Your Desktop
How to Create a Shutdown Icon on Your Desktop
In this article you will be shown how to create an interactive icon on your desktop that shuts down your PC.

1.Open Notepad and type in (without quotes) "c:windowssystem32shutdown -s -f -t 10".Save it as "shutdown.bat"(you have to change the file type drop down box to "All Files(*.*)"). DO NOT FORGET THE ".bat"!

2.Find a great internet photo of a shutdown button and save it.

3.Open Explorer and find your photo. Right click it and click Properties.
4.In Properties, switch Open With to "shutdown.bat".
5.Minimize all windows or click Show Desktop.
6.Create a shortcut of your photo and rename it Shutdown.
7.Test it! Your computer should shutdown in 10 seconds.
Available link for download
Monday, March 20, 2017
How to Create Successful Youtube Channel step by step
How to Create Successful Youtube Channel step by step
How to Create Successful Youtube Channel step by step
A tremendous amount of traffic that flows through internet every year is by users watching Youtube videos. Youtube has led to an enormous success for many people, especially singers. Many of the bloggers have also managed to harness the power of Youtube adding video content to their posts. This gives the readers a fresh way to view the blog and in turn attracts the traffic directly form Youtube.
So you are thinking of starting a youtube channel of your own soon. The following steps will help you to stay on the right path that will lef you to success.

1. The Vision
So What is your channel (my channel is siriplaza) ygoing to be about? There are so many channels on the subject you have in head, though your subject is unique. Thinks of an uniqque angle, a unique twists that will make your channel different and offer something more unique to viewers. Well, before starting take a moment to figur out if you will need to step up your editing software or buy a new camera. Another important question to ask yourself is, "How often will I be uploading videos?" Set realistic goals based on your lifestyle.
2. Picking a Name
Before you start working, take a look about top featured videos and skim through the usernames. Some are long,some are short, some are generic, some are catchy and memorable. Think about your channel, the direction it may be lead in the future and write down names that are short and sweet that suits your channel the most. Then seek out others opinion on which username you should use. Ask your friends, family or take to message boards a chatrooms for more opinions to help you decide.
3. Perfecting your Appearance
Whats the way you want your audience to view your channel and your videos? What flare, style or uniqueness would you like to come across in your videos, or will they be any at all? Sometimes its best to let more skilled individuals handle the more involved editing tasks. Youtube channel background is also seen by users from time to time. The background area should reflect the content you are providing. Your avatar can reflect your username and be branded with a logo that you might use in your videos.
4. Marketing your channel
Once you have your channel setup and a few videos for users to watch, bring awareness about your channel and videos is should be top priority. Marketing is all about presenting your content to as many people as possible while targetting those who you know might be interested. You must have to create a Fb fan page and Twitter profile. These two social networking sites will allow users not on Youtube to be exposed to your channel. Do not hesitate to interact with users on FB and Twitter in order to gain fans and followers.
The above can also be done in youtube. Find channels and Videos that are in the same genre as yours or find videos that you know its viewers might have an interested in videos. Subscribe to those channels, comment on those video. Let others know about your channel. By the way you comment that you know what you are talking about. A sneaky trick is to leave a comment which attracts people. This will expose more users to your comment and to same extent your channel. Excessive commenting or coments that say "check out my channel" will get marked as spam and could lead to you channel being suspended.
5. Consistency
Take time to know you will have available. If you have all the time in the world, make a video 5 times a week, if you dont, find out how much time you can set aside each day of week to put towards your channel.Slowly your viewers and subscribers will slowly begin to trust and view your channel. Subscribers will expect to get entertained or to get educated by your videos.
It is important to stay consistent and put out videos at the same time each week. Never let your channel, your videos comments, your twitter and FB fan page stand still. Continue to put in a little time for each component regularly. Make small achievable goals as you pass one. Stay focused and be persistent and success, it just comes.
A tremendous amount of traffic that flows through internet every year is by users watching Youtube videos. Youtube has led to an enormous success for many people, especially singers. Many of the bloggers have also managed to harness the power of Youtube adding video content to their posts. This gives the readers a fresh way to view the blog and in turn attracts the traffic directly form Youtube.
So you are thinking of starting a youtube channel of your own soon. The following steps will help you to stay on the right path that will lef you to success.
1. The Vision
So What is your channel (my channel is siriplaza) ygoing to be about? There are so many channels on the subject you have in head, though your subject is unique. Thinks of an uniqque angle, a unique twists that will make your channel different and offer something more unique to viewers. Well, before starting take a moment to figur out if you will need to step up your editing software or buy a new camera. Another important question to ask yourself is, "How often will I be uploading videos?" Set realistic goals based on your lifestyle.
2. Picking a Name
Before you start working, take a look about top featured videos and skim through the usernames. Some are long,some are short, some are generic, some are catchy and memorable. Think about your channel, the direction it may be lead in the future and write down names that are short and sweet that suits your channel the most. Then seek out others opinion on which username you should use. Ask your friends, family or take to message boards a chatrooms for more opinions to help you decide.
3. Perfecting your Appearance
Whats the way you want your audience to view your channel and your videos? What flare, style or uniqueness would you like to come across in your videos, or will they be any at all? Sometimes its best to let more skilled individuals handle the more involved editing tasks. Youtube channel background is also seen by users from time to time. The background area should reflect the content you are providing. Your avatar can reflect your username and be branded with a logo that you might use in your videos.
4. Marketing your channel
Once you have your channel setup and a few videos for users to watch, bring awareness about your channel and videos is should be top priority. Marketing is all about presenting your content to as many people as possible while targetting those who you know might be interested. You must have to create a Fb fan page and Twitter profile. These two social networking sites will allow users not on Youtube to be exposed to your channel. Do not hesitate to interact with users on FB and Twitter in order to gain fans and followers.
The above can also be done in youtube. Find channels and Videos that are in the same genre as yours or find videos that you know its viewers might have an interested in videos. Subscribe to those channels, comment on those video. Let others know about your channel. By the way you comment that you know what you are talking about. A sneaky trick is to leave a comment which attracts people. This will expose more users to your comment and to same extent your channel. Excessive commenting or coments that say "check out my channel" will get marked as spam and could lead to you channel being suspended.
5. Consistency
Take time to know you will have available. If you have all the time in the world, make a video 5 times a week, if you dont, find out how much time you can set aside each day of week to put towards your channel.Slowly your viewers and subscribers will slowly begin to trust and view your channel. Subscribers will expect to get entertained or to get educated by your videos.
It is important to stay consistent and put out videos at the same time each week. Never let your channel, your videos comments, your twitter and FB fan page stand still. Continue to put in a little time for each component regularly. Make small achievable goals as you pass one. Stay focused and be persistent and success, it just comes.
Available link for download
Subscribe to:
Posts (Atom)